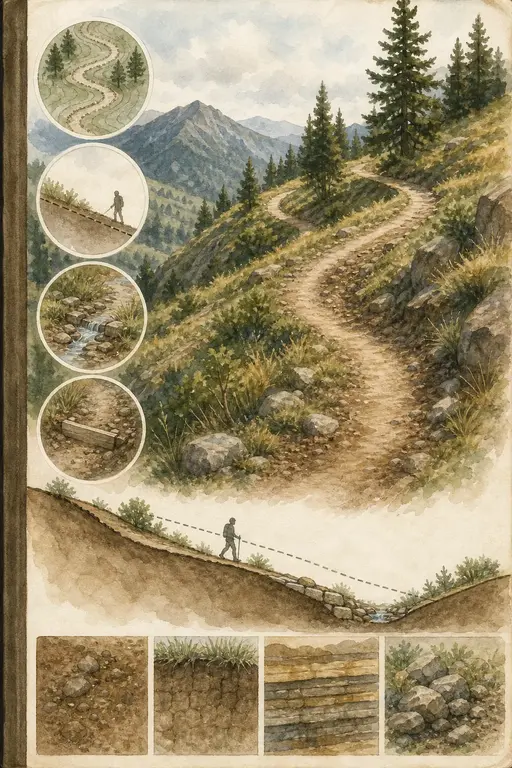
Principles of Trail Layout and Design
| Chapter 5. Principles of Trail Layout and Design..... | 5-1 |
| 5.1. Life of a Trail ..... | 5-1 |
| 5.2. Elements of a Good Trail ..... | 5-2 |
| 5.3. Identification of Need ..... | 5-2 |
| 5.4. Identification of Trail Use Types, Classifications, and Design Standards.. | 5-3 |
| 5.5. Mechanical Wear ..... | 5-4 |
| 5.5.1. Identification of Mechanical Wear by Use Type ..... | 5-4 |
| 5.5.2. Linear Mechanical Wear ..... | 5-10 |
| 5.5.3. Vertical Point Depression Features..... | 5-11 |
| 5.5.4. Sudden Grade Changes ..... | 5-12 |
| 5.5.5. Parent Soil Strength and Durability ..... | 5-13 |
| 5.5.1. Natural Erosion ..... | 5-14 |
| 5.5.2. Categories of Mechanical Wear ..... | 5-18 |
| 5.5.3. Comparative Mechanical Wear Rankings ..... | 5-21 |
| 5.6. Maintaining Natural Drainage..... | 5-22 |
| 5.7. Trail Layout ..... | 5-26 |
| 5.7.1. Review of Existing Information..... | 5-26 |
| 5.7.2. Major Control Points and Average Linear Grades..... | 5-26 |
| 5.7.3. Maximum Sustainable Linear Grades ..... | 5-27 |
| 5.7.4. Designed Linear Grades ..... | 5-31 |
| 5.7.5. Field Reconnaissance..... | 5-32 |
| 5.7.6. Final Grade Reconciliation..... | 5-50 |
| 5.7.7. Flagging the Trail Alignment ..... | 5-51 |
| 5.8. Developing Trail Work Logs and Cost Estimates ..... | 5-61 |
1. Figures
| Figure 5.1 - Conceptual Trail Corridor..... | 5-3 |
| Figure 5.2 - Comparative Ranking of Mechanical Wear Rates..... | 5-22 |
| Figure 5.3 - Relationship of Topography to Trail Grade and Layout..... | 5-24 |
| Figure 5.4 - Mapping Major Control Points and the Trail Corridor ..... | 5-28 |
| Figure 5.5 - Control Points and Segmentation ..... | 5-35 |
| Figure 5.6 - Trail Layout and Design ..... | 5-36 |
| Figure 5.7 - Identifying the Best Bridge Location..... | 5-41 |
| Figure 5.8 - Locations for Climbing Turns and Switchbacks..... | 5-44 |
| Figure 5.9 - Trail Layout Below a Ridge ..... | 5-48 |
| Figure 5.10 - Trail Alignment Ready to Flag..... | 5-51 |
| Figure 5.11 - Flagging from Two Control Points..... | 5-52 |
| Figure 5.12 - Sighting for Grade with Clinometer ..... | 5-53 |
| Figure 5.13 - Travelway Excavations ..... | 5-59 |
2. Photos
| Photo 5.1 - Trail User Surfaces: Footwear, Hooves, and Tires ..... | 5-4 |
| Photo 5.2 - Horse Hoof vs. Boot Impression (Inside Yellow Ring) ..... | 5-5 |
| Photo 5.3 - Velocity Increases Mechanical Wear ..... | 5-6 |
| Photo 5.4 - Runners Accelerating ..... | 5-7 |
| Photo 5.5 - Horse Accelerating ..... | 5-8 |
| Photo 5.6 - Mountain Bike Turning and Braking ..... | 5-9 |
| Photo 5.7 - Motorized Off Highway Vehicle Turning and Accelerating ..... | 5-10 |
| Photo 5.8 - Linear Depressions Left by Mountain Bikes and ATVs ..... | 5-11 |
| Photo 5.9 - Vertical Depressions Left by Hiker (left) and Horse (right) ..... | 5-12 |
| Photo 5.10 - Sudden Grade Increase and Corresponding Mechanical Wear ..... | 5-13 |
| Photo 5.11 - Trail Users Responses to a Sudden Grade Increase ..... | 5-14 |
| Photo 5.12 - Loose Sandy Soil and Sandstone Bedrock ..... | 5-15 |
| Photo 5.13 - Rain Drop Impact Close-Up ..... | 5-16 |
| Photo 5.14 - Captured Sheet Flow Developing a Rill ..... | 5-16 |
| Photo 5.15 - Example of Wind Generated Erosion ..... | 5-17 |
| Photo 5.16 - Trails Deformed by Mechanical Wear ..... | 5-18 |
| Photo 5.17 - Natural Surface Runoff ..... | 5-23 |
| Photo 5.18 - Poor Trail Alignment Captures and Accumulates Runoff ..... | 5-23 |
| Photo 5.19 - Trail Through an Ephemeral Watercourse (top) and Up a Hillslope (bottom) ..... | 5-25 |
| Photo 5.20 - Sheet Flow Flowing Down Slope ..... | 5-26 |
| Photo 5.21 - Examples of Topographic Features ..... | 5-33 |
| Photo 5.22 - Wet Crossing ..... | 5-37 |
| Photo 5.23 - Equestrian Ford ..... | 5-38 |
| Photo 5.24 - Scour Line (left), Bark Scar (center), and Silt Line (right) ..... | 5-39 |
| Photo 5.25 - Woody Debris (top) and Flotsam (bottom) After Flood ..... | 5-40 |
| Photo 5.26 - Watershed in Depositional Mode (left) and Healthy Watershed (right) .. | 5-41 |
| Photo 5.27 - Trail Alignment In and Out of the Influence of an Inner Gorge ..... | 5-42 |
| Photo 5.28 - Using a Rock Outcrop to Create a Topographic Turn ..... | 5-43 |
| Photo 5.29 - Locations for Climbing Turns (left) and Switchbacks (right) ..... | 5-45 |
| Photo 5.30 - Break in Slope and Natural Barriers to Prevent Cutting ..... | 5-45 |
| Photo 5.31 - Saddle on a Ridge as an Elevation Control ..... | 5-46 |
| Photo 5.32 - Trail Becoming Incised ..... | 5-47 |
| Photo 5.33 - Entrenched Trail (left) and a Saturated and Deformed Trail Bed (right) .. | 5-48 |
| Photo 5.34 - Multiple Entrenched Trails in a Meadow (left) vs. On the Edge (right) ... | 5-49 |
| Photo 5.35 - Southern Aspect (left), Northern Aspect (right) ..... | 5-50 |
| Photo 5.36 - Trail Workers of Similar (left) and Dissimilar Height (right) ..... | 5-54 |
| Photo 5.37 - Flagger Adjusts Linear Grades (top), Marks Locations (middle), and Installs Flags (bottom) ..... | 5-56 |
| Photo 5.38 - Using Rebar to Mark a Horizontal Reference Point ..... | 5-57 |
| Photo 5.39 - Curvilinear vs. Fall Line Alignment..... | 5-58 |
| Photo 5.40 - Half Full Bench (yellow line) and Full Bench (red line)..... | 5-60 |
| Photo 5.41 - Travelway Brushed, Cleared, and Reflagged ..... | 5-61 |
3. Chapter 5. Principles of Trail Layout and Design
Trail layout and design are the processes of applying modern trail design concepts to a systematic approach of laying out trails. They are used to determine the location and construction standards for a trail and are the most important elements of a trail system because if they are not performed correctly the trail will not be sustainable and will always be a liability. Trail layout and design are as much art as they are science, and a well-designed trail has both form and function. Layout and design concepts include:
- • Identifying the need for a trail and a conceptual trail corridor;
- • Identifying the intended user groups and the associated rate of mechanical wear;
- • Identifying appropriate design and construction standards;
- • Compiling information regarding the landform;
- • Identifying major control points;
- • Field reconnaissance;
- • Identifying minor control points;
- • Identifying the maximum sustainable linear grades between control points;
- • Determining linear grades between the control points;
- • Flagging the trail alignment between control points; and
- • Identifying and quantifying trail construction and trail structures.
3.1. 5.1. Life of a Trail
All trails have an impact on the land where they are constructed. This impact can be minor or severe, depending on how well the trail is designed and constructed. In addition, all trails require maintenance. Even the best-designed and constructed trails require cyclical maintenance to perform properly.
Trails can last for hundreds of years. Many trails in the United States are well over a hundred years old. In Asia, Africa, Europe, and South America there are trails that are several thousand years old. With such a lifespan, trails that are not properly designed, constructed, and maintained can have long lasting adverse impacts on natural and cultural resources, and can be a liability to the land manager's funding and staffing resources.
How well a trail performs is influenced by the quality of its design. The design process can take from days to months to complete. The more time and effort spent evaluating the landform and identifying the appropriate location, the better the trail will perform over its lifetime. Thus, a detailed planning and design process must be followed. Even the best-constructed trails will not perform well if the initial design is inadequate.
Once a trail is designed, it must be constructed to the highest standards, which can take from weeks to years to complete. Even the best designed trails will not perform if the construction is substandard.
Finally, a trail must receive the necessary maintenance to retain its designed clearance, width, shape, and drainage, and all structures must be repaired or replaced in a timely fashion. It should be assumed that these activities will occur over hundreds of years.
The frequency and amount of resources spent maintaining a trail is directly related to the quality of the trail's design and construction. Furthermore, a poorly designed, constructed, or maintained trail has a higher impact on natural and cultural resources. These conditions also lead to lower user satisfaction. If a trail is intended to last several hundred years, the initial investment in proper design and construction is critical. There must also be a commitment by the land management agency to maintain the trail for its entire lifespan.
3.2. 5.2. Elements of a Good Trail
A well-designed trail has the following characteristics:
- • Avoids sensitive natural and cultural resources;
- • Avoids problematic geomorphic features;
- • Follows curvilinear alignment;
- • Does not disrupt or alter the hydrology of the landform;
- • The linear grades do not exceed the maximum sustainable grade;
- • Has full bench construction with adequate outslope;
- • Has stable and well vegetated slopes above and below the trail bed;
- • Has watercourse crossings sized for the maximum foreseeable flood event and are passable to aquatic species, bed load, and debris;
- • Requires minimal routine and cyclical maintenance; and
- • Meets the needs of the intended user groups.
A well designed trail results in cost savings over the long-term, because storm-related failures are avoided or greatly reduced and annual maintenance is minimized.
A trail is more than a route to a desired destination; it is an experience. The designer integrates points of interest and aesthetic experiences with a technically sound alignment. A well-designed trail seamlessly traverses the natural setting. The focus of the user is on the environment they are passing through and not on the trail.
3.3. 5.3. Identification of Need
The design and layout of a new trail or trail reroute need to follow a well thought out process. This chapter outlines a process that will assist designers in laying out trails that protect natural and cultural resources, meet user needs, and are sustainable. This process will also expedite the time it takes to layout and flag a new trail alignment. It will reduce the frustration associated with traditional trail layout practices and will ensure that the best possible trail alignment has been located on the landform.
Trail design and layout begins with the concept that a trail is needed to provide access to an area or destination, which may include several points of interest or connections with other trails. Starting and ending points are then identified for the trail. Usually, these locations tie into existing trail systems or developed recreational facilities that are part of a larger facility management plan. A facility management plan may be general or specific in nature and, in identifying the need for a trail, the benefits of the new trail may have been weighed against the potential impact. (See Chapter 3, Planning and Environmental Compliance.) At this point, the proposed trail alignment is purely conceptual—a broad corridor between the starting and ending points. Its exact location on the landform has yet to be determined. Figure 5.1 illustrates a broad conceptual trail corridor (in brown) that connects a campground to a backcountry camp.

A topographic map of a section of Redwood National Park. The map features contour lines indicating elevation, with higher elevations shown in green and lower elevations in brown. A broad, irregular brown shaded area represents a conceptual trail corridor. This corridor starts at a point labeled 'Backcountry Camp' in the upper left and extends towards a 'Campground' in the lower right. The corridor follows a path through the park, avoiding steeper slopes and crossing several creeks. Labels on the map include 'REDWOODS', 'PARK', 'Grasshopper Mountain', 'Mall', and 'Campground'. A red line, likely a road, runs along the right edge of the map.
Figure 5.1 - Conceptual Trail Corridor
3.4. 5.4. Identification of Trail Use Types, Classifications, and Design Standards
Before a designer can layout a trail, they must know for whom they are designing the trail and with what standards for design and construction they must comply. During the planning process, the use for a proposed trail is identified. (See Chapter 3, Planning and Environmental Compliance.) Trails are pedestrian, equestrian, mountain biking, motorized (off highway vehicle), or multi-use. New pedestrian trails that start at a trailhead or connect to an accessible trail may be required to meet accessibility criteria. The layout and design process determines the feasibility of meeting accessibility requirements. Federal, State, and local design and construction standards, as well as the potential use types are identified. Once the use types have been identified, the proposed trail is classified using a matrix. (See Chapter 2, Trail System Development and Management.) Each classification has minimum design and construction standards that must be incorporated along with use type standards. Additionally, the potential rate of mechanical wear associated with the use type must be identified and compensated for in design, layout, and construction.
3.5. 5.5. Mechanical Wear
Mechanical wear is defined as the erosion of material from a surface by the action of another surface. As it relates to trails, mechanical wear is caused by the interaction between the mode of locomotion used by the trail user and the trail tread. The most common interaction of trail users with trail tread occurs through pedestrian footwear, tires, or horse hooves. (See Photo 5.1.)
3.5.1. 5.5.1. Identification of Mechanical Wear by Use Type
The trail designer must identify the amount of mechanical wear and associated erosion that will occur to the trail tread. All trail uses cause mechanical wear to the trail tread. However, the rate of wear will vary by the type of user and how aggressive their interaction (use) is with the trail tread.

A close-up photograph of a brown leather hiking boot with a black rubber sole. The sole shows significant wear, with the tread pattern eroded in several places. The boot is resting on a wooden boardwalk.

A photograph of a horse's lower leg and hoof. The hoof wall is significantly worn and eroded, showing a smooth, light-colored surface where the outer layer has been rubbed away. The horse is standing on a dirt path.

A close-up photograph of a tire tread. The tread pattern is heavily eroded, with the rubber surface worn down in many places, leaving a smooth, light-colored surface. The tire is on a wooden boardwalk.

A photograph of a large, heavy-duty tire mounted on a yellow vehicle. The tire shows significant wear, with the tread pattern eroded in several places. The vehicle is on a dirt path.
Photo 5.1 - Trail User Surfaces: Footwear, Hooves, and Tires
3.5.1.1. 5.5.1.1. Hardness and Shape of User Surface.
The rate of mechanical wear associated with a surface is influenced by its hardness and shape. The harder the material used for the mode of locomotion, the more likely it will cut or penetrate the trail tread. For example, shod hooves are harder than unshod hooves and footwear with Vibram soles are harder than tennis shoes with soft soles. Knobby tires with aggressive tread are harder than smooth tires with low profile tread.
3.5.1.2. 5.5.1.2. User Weight and Surface Contact Area
The heavier the user (and their means of locomotion) the more pressure is applied to the tread surface. Heavy weight combined with a small surface area at the point of contact can significantly increase the force applied to the trail tread. This increased force measured in pounds per square inch also increases the shearing and plowing capabilities of the trail user. The force delivered by pedestrians and mountain bikers is similar because their weight and surface area contact are nearly equal. However, the weight of a horse and its rider combined with the surface area of its hooves will produce more pounds per square inch to the trail tread (up to 1,500 pounds per square inch) than a hiker wearing boots or a mountain biker (up to 150 pounds per square inch). (See area circled in yellow in Photo 5.2.)

A close-up photograph of a muddy trail surface. Several hoof prints are visible, showing deep impressions in the mud. A yellow circle is drawn around a specific area of the trail tread, likely for comparison of wear or pressure. The mud is dark and wet, with some dry leaves and twigs scattered around.
Photo 5.2 - Horse Hoof vs. Boot Impression (Inside Yellow Ring)
3.5.1.3. 5.5.1.3. Velocity, Angle of Impingement, and Coefficient of Kinetic Friction
Other factors influencing the rate of mechanical wear are impact velocity, angle of impingement of the user surface (e.g. foot, tire, horse hoof), and the coefficient of kinetic friction between the user surface and the trail tread. The faster the trail user is moving, the higher the impact velocity is to the trail tread. The more acute the impingement angle, the more effective the user surface area is at cutting, fragmenting, and plowing the trail tread. Both of these factors increase the coefficient of kinetic friction between the user surface and the trail tread. The higher the coefficient of kinetic friction the higher the potential for abrading the trail surface (See Photo 5.3.)

A collage of four photographs showing different trail users. The top-left photo shows a person riding an ATV on a dirt trail, kicking up a large cloud of dust. The top-right photo shows a person riding a mountain bike on a dirt trail. The bottom-left photo shows a person running on a dirt trail. The bottom-right photo shows a person riding a horse on a dirt trail.
Photo 5.3 - Velocity Increases Mechanical Wear
With all the types of trail uses discussed above, the faster the speed of travel when the user is accelerating, braking, or turning, the greater the mechanical wear to the trail tread. Similarly, the harder the surface and the greater the coefficient of friction of the material impacting the trail tread, the greater the mechanical wear is to the trail tread.
3.5.1.4. 5.5.1.4. Acceleration, Braking, and Turning/Curving
When a trail user suddenly increases their forward motion (accelerates), suddenly decreases their forward motion (brakes), or leans to either side (turning or curving), they increase their impact velocity, impingement angle, and coefficient of friction. These actions increase the rate of mechanical wear to the trail tread.
3.5.1.4.1. 5.5.1.4.1. Pedestrians
When hikers or trail runners accelerate, they lower their center of gravity, lean forward, rise up on the balls of their feet, and push downward with their leg muscles. These actions transfer the weight of the user to the balls of their feet, which increases the pounds per square inch applied to the trail tread. The angle of the foot also becomes more acute increasing the impingement angle. (See Photo 5.4.)

A photograph showing a group of trail runners from behind as they ascend a dirt path. The runner in the immediate foreground is wearing a light blue shirt and black shorts. Several other runners are visible further up the path, including one in an orange cap and another in a red shirt. The path is uneven with some rocks, and the background shows trees and a clear blue sky.
Photo 5.4 - Runners Accelerating
When hikers and trail runners brake they lower their center of gravity, lean backward, transfer their weight to the heels of their feet, and push backward with their leg muscles. These actions transfer the weight of the user to the heel of the foot, which increases the pounds per square inch applied to the trail tread. Similarly, the angle of the foot also becomes more acute increasing the angle of impingement.
When trail runners come to a curve in the trail they lower their center of gravity, lean to the inside of the curve, and transfer their weight to the inside of one shoe and the outside of the other. These actions transfer the weight of the user to the sides of the feet, which increases the pounds per square inch applied to the trail tread. The angle of the foot also becomes more acute, increasing the angle of impingement.
3.5.1.4.2. 5.5.1.4.2. Equestrians
When horses accelerate, they lower their center of gravity, transfer most of their weight to the rear hooves, and push forward with their powerful hind legs. These actions increase the pounds per square inch applied to the trail tread. In addition, the impingement angle of the hooves becomes more acute increasing the potential to cut, fragment, and plow the trail tread. (See Photo 5.5.)

A photograph showing a person from behind, riding a brown horse on a reddish-brown dirt trail. The rider is wearing a green shirt, dark pants, and a brown cowboy hat. The horse is in motion, and its shadow is cast on the ground. The background is a dry, open landscape with sparse vegetation and hills in the distance under a clear sky.
Photo 5.5 - Horse Accelerating
When horses brake they lower their center of gravity, transfer most of their weight to their rear hooves, and push backward with their hind legs, causing the same effect on the tread surface as acceleration.
When horses are trotting or loping and come to a turn they shift their center of gravity, lean to the inside of the turn, and transfer their weight to the inside of their hooves on the outside legs and to the outside of their hooves on the inside legs. These actions transfer the weight of the horse to a smaller surface area, which increases the pounds per square inch applied to the trail tread. The angle of the hooves also becomes more acute, increasing the angle of impingement.
3.5.1.4.3. 5.5.1.4.3. Mountain Bikers
When mountain bikers accelerate, they apply more downward force to the bike's pedals, which transfers to the rear wheel in the form of torque. Torque results in greater cutting and fragmenting of the trail tread. If the mountain biker stands up on the bike pedals to apply more force, they transfer their weight to the center of the bike, which decreases the weight on the rear tire. These actions combined with the increased torque to the rear tire cause the rear tire to slip, further increasing the cutting and fragmenting of the trail tread.
When mountain bikers brake, they decrease their speed by applying force to (squeezing) the brake levers, activating the brake pads on the front and rear wheels, and reducing the speed of the tires' rotation. The harder the brakes are applied, the less wheel rotation occurs. These actions can also cause the wheels to lock up and the tires to slide across the trail, resulting in cutting, plowing, and fragmenting of the trail tread.
When mountain bikers come to a curve in the trail they lower their center of gravity, lean to the inside of the turn, and transfer their weight to the inside of the bike's tires. These actions decrease the surface area of the tire coming into contact with the trail tread, which increases the pounds per square inch applied to the trail tread. The angle of the tire also becomes more acute increasing the angle of impingement. At fast speeds, the rear tire can lose traction causing the tire to skid across the trail tread. If the user brakes coming into the turn and accelerates coming out of it, the mechanical wear rate is compounded, increasing the cutting, fragmenting, and plowing on the trail tread. (See Photo 5.6.)

A photograph of a mountain biker in a white and blue jersey, wearing a helmet and gloves, leaning sharply into a turn on a dirt trail. The biker is wearing a white jersey with blue accents and a helmet with a colorful design. The bike is white with blue and black accents. The trail is dirt and the biker is kicking up a cloud of dust. The background is a blurred green landscape.
Photo 5.6 - Mountain Bike Turning and Braking
3.5.1.4.4. 5.5.1.4.4. Off Highway Vehicles
ATVs and similar OHVs are light weight vehicles that can generate high amounts of torque to their tires. The amount of torque and its corresponding effects on the trail tread are directly related to the degree of acceleration applied by the rider. When a rider accelerates an OHV, more torque is applied to the vehicle's tires. As the torque increases, the cutting and fragmenting of the trail tread also increases. Rapid acceleration can cause tires to slip, further increasing the cutting and fragmenting of the trail tread.
When OHV riders brake their vehicles, they decrease their speed by first applying their rear brakes and then squeezing the grips on the handle bars to compress the front brake pads against the wheel drums, reducing the speed of tire rotation and slowing the vehicle. The harder the brakes are applied, the less wheel rotation occurs until the wheels lock up. When the wheels are locked-up, the tire slides across the trail tread, resulting in cutting, plowing, and fragmenting of the trail tread.
When an OHV rider comes to a curve in the trail, they turn their tires into the turn, lean to the inside of the turn, and transfer their weight to the inside of the vehicle. This weight transfer increases the pounds per square inch applied to the outside of the tires on the inside of the turn and to the inside of the tires on the outside of the turn. The angle of the tires also becomes more acute increasing the angle of impingement. At fast speeds, the rear tires can lose traction causing the tires to skid across the trail tread, further increasing the cutting, fragmenting, and plowing effects on the trail tread. When braking and accelerating in a turn, cutting, fragmenting, and plowing are further increased. (See Photo 5.7.)

A photograph of a person riding a blue Yamaha four-wheeled off-highway vehicle (OHV) on a dirt trail. The rider is wearing a blue helmet, goggles, and a blue and white patterned jacket. The vehicle is leaning into a turn, with the front wheel angled towards the left and the rear wheel angled towards the right. The rider's body is also leaning into the turn. The trail is composed of reddish-brown dirt, and there is some dust or dirt being kicked up by the rear wheel. The background shows green foliage and trees.
Photo 5.7 - Motorized Off Highway Vehicle Turning and Accelerating
3.5.2. 5.5.2. Linear Mechanical Wear
When tires (bicycle or OHV) roll over the trail, they can create a linear indentation in the trail tread. (See Photo 5.8.) Development of these linear features usually occurs when the trail tread material is soft and susceptible to being depressed or compacted. Soft soil often results from soils being overly dry (friable) or overly wet (saturated) and is characterized by a lack of cohesion. In this state, soil becomes unconsolidated and wheels can sink into the soil and leave a continuous depression in the trail tread. Because these linear depressions are below the surface of the trail tread, they can catch and trap surface water runoff. Accumulated water can flow down the trail, gaining volume and energy and causing significant erosion that enlarges the linear depression. If left unchecked, this erosion can develop rills in the trail tread. Linear depressions also significantly disrupt the trail's ability to transport sheet flow across the tread and down the slope below the trail. When this situation occurs, the trail becomes a watercourse feature that disrupts the natural hydrological processes of the landform.

A photograph showing a narrow, muddy linear depression running down a grassy trail. The depression is filled with brown, muddy water, and the surrounding grass is green and dry.

A photograph showing a deep, muddy linear depression running down a grassy trail. The depression is filled with brown, muddy water, and the surrounding grass is green and dry.
Photo 5.8 - Linear Depressions Left by Mountain Bikes and ATVs
When identifying the potential for mechanical wear, linear depressions must be considered a significant factor. Their ability to capture and divert water down the trail can quickly erode the trail tread and affect the trail's ability to sheet overland water flow.
3.5.3. 5.5.3. Vertical Point Depression Features
When a pedestrian or horse step on a trail, they have the potential to create a vertical point depression in the trail tread. Similar to linear depressions, the development of these features usually occurs when the trail tread soil is saturated or dried out and is friable. Vertical point depressions form when the shoe of a pedestrian or hoof of a horse sinks into the trail tread. How far something sinks into the tread depends on the softness of the soil (lack of resistance) and how much weight (measured in pounds per square inch) is applied to the tread surface. For these reasons, the vertical point depressions left by horses are substantially deeper and problematic than those left by pedestrians. (See Photo 5.9.) These depressions deform the tread surface and disrupt overland sheet flow. They also trap water in the trail tread, which can cause the surrounding soil to become saturated, unconsolidated, and lose its cohesion.
Again, when identifying the potential for mechanical wear, vertical point depressions must be considered a significant factor. Their ability to disrupt sheet flow across the trail and break up soil structure can reduce the trail tread's ability to retain its desired shape and ultimately its performance.

Photo 5.9 - Vertical Depressions Left by Hiker (left) and Horse (right)
3.5.4. 5.5.4. Sudden Grade Changes
It is not uncommon to have a sudden grade increase in a trail alignment. A sudden grade change occurs when the linear grade increases by a factor of two or three over a short distance without any transitional grade in between. Examples of sudden grade changes include going abruptly from a 5% to 10% grade or from a 7% to 20% grade. Sudden grade changes are often related to adjustments in the trail alignment to go above or below a control point or drop in or climb out of natural or constructed watercourse crossings, grade reversals, or rolling dips. They typically result from poor layout or construction practices. (See Photo 5.10.)
When trail users encounter a sudden change in linear grade they respond in the same manner as they do when accelerating or braking. (See Photo 5.11.) This response is more about gravity than speed. To compensate for traversing up a steep grade, pedestrians lower their center of gravity, lean forward, and push off with the balls of their feet. To compensate for traversing down a steep grade, they lean backward and dig in with their heels. When going uphill or downhill, horses lower their center of gravity, push off with their rear legs or dig in with their rear legs. Mountain bikers apply more force to the bike pedals (including standing on their pedals) when going uphill and apply the brakes to the front and rear tires when going downhill. OHV riders accelerate their vehicles when going uphill and apply the brakes when going downhill.

A photograph of a muddy trail in a forest. The trail is dark and wet, with a sudden increase in grade. A shovel and a rock are lying on the ground near the trail.

A photograph of a gravel trail on a hillside. The trail is made of loose gravel and shows significant mechanical wear, with deep ruts and a rough surface. The surrounding vegetation is dry and sparse.
Photo 5.10 - Sudden Grade Increase and Corresponding Mechanical Wear
Because of the increased mechanical wear, sudden grade changes should be avoided by following the layout and design principles identified in this chapter and Chapter 14, Drainage Structures. If a drainage structure such as a grade reversal is used, the grades going into and out of the structure should be gradual and never exceed the maximum sustainable linear grade.
3.5.5. 5.5.5. Parent Soil Strength and Durability
The composition of the soil comprising the trail tread also affects the rate of mechanical wear. Native tread material can vary from sand to bedrock. The harder and more consolidated the tread surface, the more resistant it is to mechanical wear. (See Photo 5.12.)
When a trail is placed on bedrock it can sustain the most aggressive forms of trail use and receive little or no mechanical wear. If placed on weak, saturated, or unconsolidated soil, even trail uses with the lowest rate of mechanical wear will cause increased rates of mechanical wear. Thus, as the rate of mechanical wear increases, the need to locate the trail on the most stable and durable soil increases.

A 3x2 grid of six photographs showing trail users' responses to a sudden grade increase. The top row shows a man with a backpack walking uphill, leaning forward. The middle row shows a person on a mountain bike climbing a steep, sandy trail, leaning back. The bottom row shows a person on a horse climbing a steep, sandy trail, leaning back.
Photo 5.11 - Trail Users Responses to a Sudden Grade Increase
3.5.6. 5.5.1. Natural Erosion
Natural erosion is caused by the impact of solid or liquid particles against the surface of the trail. The impacting particles gradually remove material from the tread surface through repeated deformation and cutting actions.

The image consists of two side-by-side photographs. The left photograph is a close-up shot of a hiker's foot, wearing a brown hiking boot, stepping onto a trail. The ground is composed of loose, light-colored sandy soil and some dry, brown pine needles. The right photograph shows a wider view of a trail on a sandy, eroded hillside. A hiker is visible in the distance, walking along the trail. The terrain is characterized by its sandy texture and some sparse, dry vegetation. The sky is overcast.
Photo 5.12 - Loose Sandy Soil and Sandstone Bedrock
3.5.6.1. 5.5.1.1. Water
Rainfall is a natural erosion process affecting trail tread. The impact of a raindrop on trail tread can dislodge soil particles creating small depressions in the trail surface. When repeated thousands of times, the cumulative effect can result in the deformation and loss of surface soil. (See Photo 5.13.)
Surface runoff in the form of sheet flow occurs when the ground becomes saturated and can no longer absorb rain water or when the intensity of the rain exceeds the ground's capacity to absorb it. Once the saturation point is reached, a thin film of water in the form of sheet flow is pulled down slope by gravity into low areas or depressions in the ground's surface. When these small depressions (crenulations or swales) begin to collect and concentrate sheet flow, the rainwater becomes a more powerful erosive force that can lead to the development of small watercourses.
When sheet flow is intercepted by a trail, it can flow either across or down the trail, depending on a number of variables including the firmness and uniformity of the tread surface and the steepness of the hillslope, trail grade, or the trail tread's outslope. If the sheet flow crosses the trail it remains a thin film of water with little capacity to dislodge and transport soil particles. If it flows down the trail, it gains volume and energy that have the capacity to dislodge soil particles. If left unchecked, erosional features such as rills and gullies may develop in the trail tread. (See Photo 5.14.)

A high-speed, close-up photograph of a rain drop hitting a dark, reflective surface. The impact has created a crown-shaped splash, with numerous small droplets flying upwards and outwards. The background is solid black, making the white and grey water droplets stand out prominently.
Photo 5.13 - Rain Drop Impact Close-Up

A photograph of a dirt trail in a wooded area. A person wearing a plaid shirt and blue pants is crouching on the trail, looking down at the ground. The trail is covered in rocks and debris, and there is a small stream of water flowing over it, illustrating the concept of sheet flow developing a rill.
Photo 5.14 - Captured Sheet Flow Developing a Rill
3.5.6.2. 5.5.1.2. Wind
The movement of air across the surface of the earth creates a force that has the capacity to dislodge soil particles. Once dislodged, these moving particles can be transported away from the trail tread or they can impact otherwise stable soils, resulting in incremental erosion. (See Photo 5.15.)

A photograph showing a trail tread on a rocky, sloping terrain. A large plume of dust or fine soil is being kicked up by the wind, obscuring the trail surface and the background. The sky is clear blue.
Photo 5.15 - Example of Wind Generated Erosion
3.5.6.3. 5.5.1.3. Mechanical Wear and Natural Erosion
When mechanical wear deforms the trail tread, the trail loses its structure and is more susceptible to natural erosion. Divots, vertical depressions, linear depressions, gouges, scrapes, and scuff marks can trap and concentrate water or divert it down the trail leading to soil saturation, displacement, and mobilization. Loose, unconsolidated soil is subject to wind erosion during dry periods and mobilization during wet periods.
Once the tread becomes deformed by these natural processes, it is even more vulnerable to mechanical wear. In a deformed state, the trail tread will rapidly deteriorate as mechanical wear and natural erosion work together. (See Photo 5.16.)

A close-up photograph of a trail tread. The surface is dark brown, loose soil with many small, light-colored rocks and pebbles exposed. The soil appears crumbly and uneven, showing signs of significant mechanical wear from foot traffic.

A photograph of a dirt trail winding through a forest. The trail is made of reddish-brown soil and is marked with numerous tire tracks and footprints, indicating heavy use. The trail is flanked by dense green vegetation and trees.
Photo 5.16 - Trails Deformed by Mechanical Wear
3.5.7. 5.5.2. Categories of Mechanical Wear
All land management agencies have mission statements that define how their land will be managed. These mission statements influence the type of trail activities that occur on their land. The Department's mission statement is as follows:
To provide for the health, inspiration, and education of the people of California by helping to preserve the state's extraordinary biological diversity, protecting its most valued natural and cultural resources, and creating opportunities for high-quality outdoor recreation.
In addition, the Department has policies that define what trail activities can occur within a given park. These trail uses can range from hiking to off highway vehicle use. Both trail uses are appropriate when consistent with the park unit's classification and policies, assuming the trails are properly planned, designed, constructed, maintained, and managed.
The type of use a trail receives greatly influences the rate of mechanical wear applied to the trail tread and structures. The more aggressive the interface between the trail tread and the user is the greater the mechanical wear. Trails can be broadly grouped based on the level of mechanical wear received.
3.5.7.1. 5.5.2.1. Low Mechanical Wear
Some trail users are seeking a more passive trail encounter where the user experience is on the "setting" rather than the mode of travel. The user's interaction with the trail tread is non-aggressive, which minimizes mechanical wear. Examples of trail uses in this category include day hiking, backpacking, and mountain biking (non-technical recreational riding, low speeds with minimal acceleration and braking). Trail design and construction techniques are used to retain the natural hydrological processes and enhance the user's interaction with the surrounding environment.
3.5.7.1.1. Trail design, construction, and management techniques for low mechanical wear include:
- 1. Perform thorough background research to increase your knowledge of the landform.
- 2. Avoid significant impacts to sensitive natural and cultural resources
- 3. Mitigate potential impacts to natural and cultural resources and avoid problematic landform controls.
- 4. Layout trails following curvilinear alignment.
- 5. Separate trails from all watercourse features including micro watercourses (dip in and pull out).
- 6. Stay within the maximum sustainable grade of the landform.
- 7. Avoid sudden grade changes.
- 8. Locate trail alignments on hillsides with slopes 20% or greater whenever possible.
- 9. Construct trails with a full bench whenever possible.
- 10. Outslope the trail tread sufficiently (1.5 – 2 times the linear grade) to maintain natural sheet flow across the trail.
- 11. Perform trail construction to the highest standards.
- 12. Allow the trail tread to cure before use.
- 13. Perform the proper selection, placement, and construction of all trail structures.
- 14. Design and construct trails that meet the needs of the intended user group(s).
- 15. Employ seasonal trail closures when tread soil is weak and unconsolidated.
- 16. Inspect trails annually for maintenance and repair needs.
- 17. Perform the required routine and cyclical trail maintenance.
- 18. Monitor trails and apply adaptive management concepts to constantly improve design, layout, construction, and management practices.
- 19. Establish and post speed limits.
3.5.7.2. 5.5.2.2. Moderate Mechanical Wear
With uses that cause moderate mechanical wear, the user is focused on both the setting and mode of travel. The mode of travel is as important as being in the natural environment. The user's interaction with trail tread is more aggressive, which increases mechanical wear. Examples of trail uses in this category include trail running (low speeds with moderate acceleration and braking), equestrian (walking only, low number of users, and minimal acceleration and braking), mountain biking (technical, single track riding), multi-use, and OHVs (low speed recreational). Additional design, construction, and maintenance are required to preserve the outdoor experience, provide a challenge, and mitigate the increased mechanical wear.
3.5.7.2.1. Trail design, construction, and management techniques for moderate mechanical wear include:
- 1. All of the techniques listed above for low mechanical wear.
- 2. Increase trail sinuosity to reduce the speed of users.
- 3. Trail sinuosity should be horizontal on the landform and not vertical.
- 4. Trail design utilizes natural features to create a slalom type experience going around features such as trees and rocks.
- 5. In the absence of natural features, install pinch points to slow trail users.
- 6. Reduce tread width and sight distance to slow trail users.
- 7. Install trail texturing to slow trail users.
- 8. When outsloping is insufficient to effectively maintain sheet flow across the trail, install grade reversals with moderate grade approaches to facilitate drainage across the trail.
- 9. Employ the use of “run outs” at the bottom of lengthy downhill trail segments.
- 10. Use tread armoring techniques such as turnpikes, causeways, rip rap, stone pitching, aggregate surfacing, chemical hardeners, running planks, boardwalks, corduroy, concrete pavers, geo blocks, or grass pavers to reduce mechanical wear and improve tread life.
- 11. Expand the use of seasonal and temporary trail closures.
- 12. Limit the amount of use to reduce user impacts.
- 13. Inspect trails biannually for maintenance and repair needs.
- 14. Increase routine and cyclical trail maintenance to compensate for increased mechanical wear.
3.5.7.3. 5.5.2.3. Heavy Mechanical Wear
With uses that cause heavy mechanical wear, the user is primarily focused on the mode of travel. The user's interaction with the trail tread is very aggressive, which substantially increases mechanical wear. Examples of trail uses in this category include equestrian (endurance racing, high numbers of users or pack stock), mountain biking (downhill and free riding), and OHVs (aggressive riding). Additional design, construction, maintenance, and management techniques are used to mitigate resource impacts and provide the user with a challenging experience.
3.5.7.3.1. Trail design, construction, and management techniques for heavy mechanical wear include:
- 1. All of the techniques listed above for low and medium mechanical wear.
Note that the use of curvilinear alignment, staying within the maximum sustainable linear grade, and using the standard switchback and climbing turn designs may not be applicable to some trail uses in this category as these concepts conflict with the trail experience some users are seeking. - 2. Locate trail alignments on bedrock or rocky terrain whenever possible to reduce mechanical wear.
- 3. When outsliping and grade reversals are insufficient to effectively maintain sheet flow across the trail, install rolling grade dips to facilitate drainage across the trail.
- 4. Increase the use of water management control structures to remove water from the trail.
- 5. When installing climbing turns and switchbacks, design the turns to be banked and incorporate rolling dips.
- 6. Increase tread armoring where required and appropriate.
- 7. Develop a sediment budget to monitor and manage soil erosion.
- 8. Install erosion control measures.
- 9. Install sediment collection basins below the trail alignment to reduce the volume of sediment entering the watershed.
- 10. Monitor the performance of soil erosion control techniques including water sampling for turbidity levels.
- 11. Employ one-way traffic to increase safety.
- 12. Close, rehabilitate, and rotate trail alignments once they become degraded.
- 13. Increase management patrols to ensure user compliance, improve safety, and respond to emergencies.
- 14. Inspect trails quarterly for maintenance and repair needs.
- 15. Substantially increase routine and cyclical trail maintenance to compensate for increased mechanical wear.
3.5.8. 5.5.3. Comparative Mechanical Wear Rankings
It should be noted that the preceding examples of mechanical wear are based on a comparative ranking of the user's capacity to generate mechanical wear and the type of interaction they have with the trail tread. Individual trail users can alter their comparative ranking. However, these rankings reflect the potential rate of mechanical wear associated with various user groups and uses. The examples provided are intended to help trail professionals design and construct trails that are either sustainable or not sustainable but maintainable. (See Figure 5.2.)

| Type of Use | Range of Mechanical Wear |
|---|---|
| hiking day use | Low |
| backpacking | Low |
| mountain biking recreational single track | Low |
| trail running | Low |
| equestrian walking low use | Low |
| mountain biking technical | Medium |
| multi use | Medium |
| ATV recreational low impact | Medium |
| equestrian walking high use/pack stock | Medium |
| mountain biking free ride & downhill | High |
| equestrian endurance races | High |
| ATV/OHV aggressive riding | High |
Figure 5.2 - Comparative Ranking of Mechanical Wear Rates
3.6. 5.6. Maintaining Natural Drainage
Successful trail design requires a basic understanding of hydrology, geology, soil science, engineering, and trail construction and maintenance. Traditional design usually employs drainage features or structures that collect water from watercourses bisected by the trail, as well as from overland runoff (“sheet flow”). Water is the most influential factor in designing and laying out trails, yet its impact is often underestimated. Overland runoff must be allowed to travel its natural path. Water should stay within the natural watercourse and not be captured by the trail nor by an inboard ditch. If a landform’s flow path is diverted and water accumulates, water will gain volume and energy and cause erosion. Photo 5.17 illustrates how natural surface drainage directs runoff into depressions where it forms a watercourse. Photo 5.18 demonstrates how a poorly aligned trail (dashed red line) causes surface runoff to be diverted (in yellow areas), captured, and accumulated (in orange areas).
Natural flow is maintained by laying out trails on the contour of the land, which helps facilitate natural sheet drainage. This type of trail layout is called curvilinear alignment (crossing contour lines at nearly flat or oblique angles). Curvilinear layout keeps the trail alignment nearly perpendicular to natural sheet runoff, and requires following the landform, pulling in and out of swales and crenulations. Pulling in, dipping down, and pulling up and out of drain swales (even in the most subtle crenulations) ensures that the trail alignment cannot capture or divert flow. This technique effectively de-couples the trail from the watershed and eliminates or minimizes the need for drainage structures such as grade reversals and water bars that use the trail to capture water and drain it onto the slope below the trail where rills and gullies can form. Curvilinear alignment does not alter the flow of watercourses bisected by the trail, which is critical to plant and animal communities associated with wetland and riparian corridors. (See Figure 5.3.) Photo 5.19 illustrates how a trail gradually dips down and pulls out of an ephemeral watercourse (top) and contours up the hillslope (bottom).

A photograph of a dry, hilly landscape. Blue lines are drawn on the terrain to indicate natural surface runoff paths, showing water flowing down the slopes. Three orange clouds with blue rain lines are positioned above the hills, showing water falling on the landscape.
Photo 5.17 - Natural Surface Runoff

A photograph of the same dry, hilly landscape as Photo 5.17. A red line represents a trail alignment. Several yellow and orange ovals highlight areas where the trail crosses or follows runoff paths, indicating poor trail alignment that captures and accumulates runoff.
Photo 5.18 - Poor Trail Alignment Captures and Accumulates Runoff

TOPOGRAPHIC PROFILE OF TRAIL LAYOUT
Figure 5.3 - Relationship of Topography to Trail Grade and Layout

RELATIONSHIP OF TOPOGRAPHY TO TRAIL GRADE AND LAYOUT
CALIFORNIA STATE PARKS
NOT TO SCALE

The image consists of two photographs. The top photograph shows a forest floor with a trail bed. A red dashed line indicates the trail path, and a blue dashed line indicates the drainage path. The trail bed is constructed on a hillside. The bottom photograph shows a forest floor with a trail bed. A yellow dashed line indicates the trail path. The trail bed is constructed on a hillside.
Photo 5.19 - Trail Through an Ephemeral Watercourse (top) and Up a Hillslope (bottom)
Constructing a trail bed on a hillslope rather than flat ground will also enhance the trail's drainage performance. Constructing into the hillslope will facilitate more efficient overland sheet flow drainage. When the sheet flow runs down the cut bank in a thin film it accelerates, giving it the momentum to flow across the trail bed and down the hillslope. (See Photo 5.20.) Curvilinear alignment combined with sustainable linear grades, hillside construction, and outsloping prevents water diversion and accumulation. Retaining the landform's natural drainage patterns is the key to sustainable trails.

A photograph of a dirt trail winding through a forest. Blue lines are drawn on the image to illustrate the natural drainage patterns (sheet flow) down the slope, showing how the trail's alignment follows the landform's contours to prevent water diversion and accumulation.
Photo 5.20 - Sheet Flow Flowing Down Slope
3.7. 5.7. Trail Layout
3.7.1. 5.7.1. Review of Existing Information
Before a trail designer begins field work they must have a thorough understanding of the landform the trail will be traversing. A review of all applicable literature, including the geology, hydrology, soils, topography, and cultural and natural resources, is required. Extra attention needs to be given to reports on sensitive cultural, plant, and animal resources that could be impacted by the proposed trail. Other important background information includes property boundaries, easements, rights-of-way, and other transportation routes. Some agencies have geographic information systems (GIS) that can provide most of this information. Existing management, trail, transportation, and watershed plans are reviewed to ensure the proposed trail is in compliance with long-range goals for that region. Historic photographs, topographic maps, and aerial photographs aid better understanding of the landform. If available, LiDAR images and SHALSTAB digital mapping programs provide even greater detail and geomorphic information on the landform. In addition, CEQA documents and biological assessments developed for projects in the vicinity can contain information valuable to trail planning and construction.
3.7.2. 5.7.2. Major Control Points and Average Linear Grades
Once the existing information is reviewed and assimilated, the major control points between the starting and ending of the trail are identified. These points are identified during the literature review process and confirmed by field reconnaissance. Major control points include highway accesses, railway crossings, large bodies of water, massive landslides, avalanche chutes, talus slopes, and steep cliffs. Generally, these points are where the new trail alignment must pass through (“positive controls”) or avoid (“negative controls”). After these points are confirmed and established, the broad trail corridor is narrowed and adjusted to accommodate these locations. Mapping software can be used to draw the trail corridor following the principles of curvilinear alignment. This corridor is adjusted to avoid or join the major points. Most mapping software will calculate the distance of the trail corridor drawn. The average linear grade between major control points is then calculated by dividing the elevation difference between two control points by the linear distance between the points. For example, if the elevation difference between the two control points is 200 feet and the linear distance between them is 2,000 feet, the average linear grade will be 10% (i.e., or 10%).
Mapping software can also be used to calculate elevation changes and average linear grades. However, these programs provide only rough estimates and should only be used prior to field validation. Once this calculation is performed, the linear grade between the points is compared to the maximum sustainable linear grade of the landform and accessible trail design standards. By breaking the trail corridor into individual segments between control points, the trail alignment is divided into manageable units. Segmentation is an important step that greatly simplifies layout and design.
In Figure 5.4, major control points are identified on a map and the trail corridor is redrawn (in light brown) to avoid negative control points and connect to positive control points. Segments between the major control points are identified (vertical black dashes). Topographic maps and mapping software is then used to obtain the distance and elevation differences between the major control points.
3.7.3. 5.7.3. Maximum Sustainable Linear Grades
Maximum sustainable linear grade is the linear grade of a trail that, when combined with proper layout and construction, will result in a trail bed that requires only routine maintenance and will not threaten resources, even when subjected to severe weather conditions or heavy use. All trails require some level of maintenance. However, a sustainable trail should perform its intended purpose without the need for non-cyclical maintenance and should not be subject to catastrophic failures during significant storm events.
The maximum sustainable grade is initially determined by evaluating information obtained during the literature research and from design standards. However, this initial grade needs to be refined and validated by field reconnaissance. The following variables determine the maximum sustainable grade of a trail.

The figure is a topographic map of a section of Redwood Valley, California. It highlights a trail corridor in orange, which runs from the northwest towards the southeast. The corridor is defined by major control points marked with black squares. Key locations labeled on the map include Backcountry Camp, Arch. Site (at the northwest end), Redwood Lilly Habitat, Over Steepened Slopes, Salamander Habitat, Landslide, Arch. Site (at the southeast end), Campground, and Bridge. The map also shows various geographical features like Greenhorn Mountain, Redwood Valley, and the Redwood River. A legend in the bottom left corner identifies the symbols: a white square for 'Major Control Points', an orange square for 'Narrowed Trail Corridor', and a black square for 'Segments Between Major Control Points'.
Figure 5.4 - Mapping Major Control Points and the Trail Corridor
Trail user types, their interaction with the trail tread, and the amount of use affect the rate of mechanical wear to the trail tread and the trail's sustainability. As previously discussed, there are different rates of mechanical wear associated with each user group. The rate of mechanical wear must be considered when identifying the maximum sustainable grade. The amount of use a trail receives also affects the rate of wear; the higher the use, the greater the amount of wear that occurs. Also a single event, such as a horse endurance ride or a mountain bike race, can significantly affect the rate of mechanical wear. Often trails that were never designed to accommodate these events are used several times a year without regard to the impacts they can cause. If these types of events are intended for a new trail, the impacts must be factored into determining the sustainable grade.
3.7.3.1. 5.7.3.1. Soil Strength and Durability
Evaluate the parent soils, including percentage of rock aggregate, percentage of fractured rock, rock size, gradation, hardness, and percent of clay in the rock-soil matrix. Soils that have a high percentage of aggregate with fractured faces and a good size gradation will lock together well when mixed with a moderate amount of clay. This soil type has high strength and durability characteristics. Soil with low amounts of aggregate, minimal gradation in rock size, round rock faces, or a high percentage of clay has low soil strength and durability characteristics. The greater the strength and durability, the more linear grade the trail can sustain. Soil characteristics often change over the length of a trail alignment, and linear grades need to be adjusted accordingly.
3.7.3.2. 5.7.3.2. Annual Rainfall
The amount of annual rainfall affects performance of the trail bed. High levels of rainfall can result in soil saturation and weak soils, as well as deformation of the trail surface when subjected to use. Generally, high annual rainfall reduces the amount of linear grade a trail can sustain.
3.7.3.3. 5.7.3.3. Rainfall Intensity
The intensity of rainfall can affect the performance of a trail's surface, especially where the runoff coefficient is high due to up slope conditions, such as the amount of exposed bed rock in the watershed, a lack of vegetative cover, road building, grazing, or recent fire activity in the watershed. High rainfall intensity can generate a significant runoff response up slope, which can impact drainage structures and trail surfaces. Drainage structures need to be designed and constructed to accommodate this runoff and the linear grades need to be adjusted to reduce the possibility of rilling caused by increased sheet flow.
3.7.3.4. 5.7.3.4. Canopy Cover
A forest canopy can help protect the trail bed in several ways. It reduces the impact associated with rain drops falling directly on the trail's surface. Each rain drop produces enough energy to dislodge small particles of soil, which not only dislodges and transports the particles, it can break up the protective crust of the trail's surface. The leaves and needles in the canopy absorb most of this impact and the leaves and needles on the trail surface protect soils that would be otherwise exposed. The organic layer on the trail's surface also provides a cushion against the mechanical wear associated with tires, hooves, and boots. Finally, the shade provided by the canopy and the organic layer on the trail's surface help retain the soil moisture in the trail bed during dry periods. Moisture helps maintain the electrostatic bonding between soil particles. When soil is dry that bonding is decreased and the soil becomes friable. Reduced friability reduces soil erosion and maintains the integrity of the trail bed. The presence of canopy cover may improve the performance of trail surfaces and allow for an increased linear grade.
3.7.3.5. 5.7.3.5. Percent of Hillslope
The relationship between hillslope grade and linear trail grade is one of the most important factors in trail design. As hillslope grade increases, the linear trail grade can also increase up to the limit established by other variables discussed in this section. Correspondingly, as hillslope grade decreases, linear trail grade also needs to decrease. If linear trail grade begins to approach hillslope grade, the trail begins to align with the "fall line" of sheet flow drainage directed by the landform. A fall line trail will capture sheet flow and become a water conveyance. The recommended ratio of hillslope to linear trail grade is based on all the variables used to determine the maximum sustainable grade. In some locations, a 2:1 ratio of hillslope to linear grade may be adequate, while in other locations a 3:1 ratio may not be enough. The relationship between the two grades is critical to the long-term sustainability of the trail.
3.7.3.6. 5.7.3.6. Location on the Hillslope
Generally, within a watershed, trail alignment at lower elevations will encounter more shallow groundwater and accumulate greater amounts of sheet flow than trails at higher elevations. The amount of sheet flow and shallow groundwater that accumulates on the trail is generally proportional to the watershed's surface area above the trail alignment. This concept is important to understand when designing trails on slopes because the more water the trail encounters, the lower the linear grade it can sustain. In addition, trails at the bottom of a watershed usually encounter less stable geology, as inner gorges undergo a more dynamic geomorphic process. Trail alignments at higher elevations in the watershed usually can sustain higher linear grades.
3.7.3.7. 5.7.3.7. Season of Use
Trails used year-round need to be designed to compensate for additional wear to the trail tread that occurs during the wet season. Water saturation weakens the trail surface, making it more susceptible to erosion and deformation. Holes and ruts in the trail bed capture water and lead to rapid deterioration. Typically, trails that are designated for use during the wet season need to have a low amount of use, excellent parent soil, be surfaced with a stabilizing material, or have low linear grades.
3.7.3.8. 5.7.3.8. Evaluation of Existing Trails
An additional method of determining the maximum sustainable grade of a proposed trail is to evaluate existing trails in the same geographic area. Assuming that the existing trails have the same characteristics identified above as the proposed trail, they can be used as a tool to ground truth the maximum sustainable grade analysis. The key to using existing trails as indicators of maximum sustainable grades is that those trails or portions of those trails must possess the appropriate curvilinear alignment and proper trail construction characteristics. Unfortunately, there are very few trails that possess those qualities. However, you can usually find a segment or segments that meet these criteria. By knowing the use type, levels of use, and seasons of use, and by closely monitoring the linear grade, cross slope, and soil conditions, you can begin to establish the threshold of sustainable linear grade on these trail segments.
3.7.3.9. 5.7.3.9. Evaluating and Interpreting the Criteria
The above criteria can influence the maximum sustainable grade either positively or negatively. When using these criteria to determine the maximum sustainable linear grade it is important to note that they are very much inter-related. They can collectively increase or decrease the maximum linear grade. They may also offset each other when some of the criteria have a positive influence and others have a negative influence on the linear grade. For example, the proposed trail corridor may be located high in a watershed that receives a moderate amount of rainfall and has low intensity rainfall events. All of these conditions enhance the maximum linear grade capabilities of the trail. However, if the soils have low strength and durability characteristics and there is an absence of canopy cover, these negative conditions offset the positive criteria and the maximum linear grade would not increase and could even decrease. Interpreting these criteria is as much art as it is science and the more experience the trail designer has in laying out, constructing, and maintaining trails the better they will be able to evaluate the landform. As previously mentioned, some of these variables may change throughout the proposed alignment, which could alter the maximum sustainable grade. There may not be a single maximum sustainable grade for the entire alignment but several maximum linear grades along the proposed trail corridor.
Once the maximum linear grade has been identified between the major control points, it can be compared to the average linear grade determined by the rise over run calculation. If the average grade is steeper than the maximum sustainable grade, the trail alignment needs to be adjusted (lengthened) to conform to the grade limit. Using the above example of two control points that are 2,000 feet apart with a 200 foot elevation difference, if the maximum sustainable linear grade is determined to be 8% and the average linear grade between the two control points is 10%, then additional linear run must be provided to reduce the average linear grade. To determine the additional linear run needed, divide the elevation difference between the two controls by the maximum sustainable linear grade (i.e., ), then subtract the existing distance between the two points to determine the additional length needed (i.e., ). To reduce the average linear grade to 8%, an additional 500 lineal feet of trail must be added to the alignment. If landbase, resource, aesthetic, or construction issues prohibit lengthening the trail in a curvilinear fashion, then trail features and structures such as topographic turns, climbing turns, and switchbacks may be needed. Steps may also be a potential solution. These trail features and structures must be placed at appropriate locations and become minor control points.
3.7.4. 5.7.4. Designed Linear Grades
Sometimes a maximum sustainable grade may exceed the user's comfort level or needs. For example, if, due to favorable landform conditions, the maximum sustainable grade for a Class I pedestrian hiking trail ranges between 12 and 16% but the user group is largely young families, senior citizens, and casual hikers, continuous trail grades between 12% and 16% are too steep. A designed grade of 8% to 10% is more appropriate. The same 12% to 16% linear grade may be too steep for most Class I equestrian use as well since horses are usually not conditioned for unremitting steep grades.
In most situations the maximum sustainable grade will not exceed the designed grade or the grade needed by the use type. However, when those conditions do exist, the linear grade should be adjusted (lowered) to meet the needs of the user.
3.7.5. 5.7.5. Field Reconnaissance
Once a proposed trail corridor that incorporates major control points and average linear grades between the points is identified on a map, field reconnaissance is performed along the route to verify the landform. It is a good idea to involve resource specialists, including engineering geologists, hydrologists, botanists, resource ecologists, wildlife biologists, archeologists, and historians. Getting their involvement early in the design and layout process improves the evaluation of the landform, enhances the synergy that occurs between disciplines, and reduces any conflict that may occur before the environmental review. Some specialists prefer to wait until there is a flag line on the ground before they perform an assessment. Either way, the sooner resource specialists are involved, the better the layout process will be.
Prior to setting foot on the landform, it may be desirable to use a helicopter or fixed wing aircraft to fly above the proposed alignment to give the designer a “bird’s eye” view of the landform. An overhead view provides an image of the land and helps locate potential problems, such as landslides, unstable inner gorges, cliffs, and steep slopes. It also provides the designer with a view of the vegetation types growing within the trail corridor. Vegetation is often a good indicator of soil type. Some plants prefer saturated soils while others prefer rocky well drained soils. Identifying vegetation and the soil types they prefer gives the designer a good indication of the soil types they will encounter once they perform on the ground reconnaissance.
This “big picture view” also helps to understand the spatial relationships of topographic features, such as ridges, watercourses, hilltops, rock outcrops, and flat benches of land. If an overhead flight is not possible, viewing the area from a prominent elevation such as a mountain top or ridge is the next best option. Computer programs that render a 3 dimensional representation of the earth also provide the designer with a view of the landform. These programs map the earth by superimposing satellite images, aerial photography, and GIS data onto a 3D globe, allowing users to see landscapes from various angles. They provide a virtual flight over the landform with a variety of views. The quality of the view depends on the aerial photographic coverage and how recently the photographs and satellite images were taken. On the ground, this kind of overview is more difficult and time-consuming to obtain.
In Photo 5.21 below, the top view identifies vegetation, escarpments, stream valleys, and talus slopes. The bottom view identifies watercourses, vegetation, and unstable geomorphic areas.

The image consists of two photographs. The top photograph is a landscape view from a high vantage point looking across a valley towards a range of rugged, snow-dusted mountains under a clear blue sky. Three yellow circles are drawn on the middle ground mountainsides to highlight specific features: the leftmost circle highlights a talus slope, the middle circle highlights a stream valley, and the rightmost circle highlights an escarpment. The foreground shows a rocky, sparsely vegetated slope. The bottom photograph is an aerial view of a mountain slope, showing a mix of brownish-tan talus and dark green coniferous forest. Two yellow circles are drawn on the slope to highlight watercourses and unstable geomorphic areas.
Photo 5.21 - Examples of Topographic Features
On-the-ground reconnaissance requires walking the trail corridor several times to become familiar with the landscape. This exercise usually requires two to three people to maximize ground coverage. A clinometer or Abney hand level is used to take periodic linear grade measurements to ensure that the corridor stays within the previously determined average linear grade. The reconnaissance is necessary to:
- • Ground truth earlier planning and mapping efforts;
- • Identify additional control points along the proposed trail corridor and the average grade between control points, which are then worked into the adjusted trail alignment;
- • Provide an opportunity to inspect the landform to assist in determining the maximum sustainable linear trail grades. These grades are compared to the average linear grades between the control points. The alignment is adjusted as needed to stay within the maximum linear grades.
An altimeter, topographic map, and compass are used to plot locations on the landform. This data is incorporated into mapping software that produces elevations, average grades, and linear distances between control points. If satellite readings are available, a GPS unit can be used to locate and record specific positions. Elevations are taken with an altimeter at each control point to determine elevation differences between points.
3.7.5.1. 5.7.5.1. Minor Control Point Identification
While performing reconnaissance, identify minor control points including:
- • watercourse crossings,
- • seeps or springs,
- • significant or protected plants,
- • small landslides,
- • flat and poorly drained terrain,
- • excessively steep terrain,
- • sensitive archeological sites, and
- • critical animal habitat.
Often, these control points are obvious, though occasionally they are not, and careful observation of the landform is required. Conditions such as the presence of wetland obligate plants, pistol grip or tilted trees, ponding water, or old landslide rotations overgrown with vegetation indicate unstable or problematic terrain. These areas require additional investigation and thorough assessment by an appropriate specialist. All of these features are potential control points that may influence the trail alignment. Unique features such as view sheds, waterfalls, flowering plants, specimen trees, or access to water should also be considered minor control points that designers integrate into the alignment.
Minor control points are locations that the trail should go to or avoid. They differ from major control points in that the issues they present may be resolved through engineering or construction techniques. For example, if routing a trail over a small rock outcrop in the middle of the trail alignment exceeds the maximum sustainable linear grade, the trail may be constructed through the outcrop by excavation, retaining wall construction, or a combination of the two. Identification and mapping of minor control points further narrows the trail corridor and breaks it into smaller segments. Segmenting the trail corridor in this way simplifies the layout process and provides the designer with information necessary to more easily flag the trail alignment. (See Figures 5.5 and 5.6.)

The figure consists of two maps of a trail area in ATE Park, showing control points and segmentation. The maps are overlaid on a topographic map with contour lines and labels for 'Backcountry Camp', 'RED WOODS', 'ATE PARK', 'Grasshopper Mountain', 'SOUTH Fork', 'Campground', and 'Burlington'. The legend for both maps includes:
- Drainage Crossings (Blue circle)
- Rock Outcrops (Orange circle)
- Turn Locations (Grey circle)
- Scenic/Aesthetic Locations (Green circle)
The bottom map adds additional control points and segmentation:
- Narrowed Trail Corridor (Orange square)
- Segments Between Control Points (Black dashed line)
Figure 5.5 - Control Points and Segmentation

The diagram illustrates a trail layout and design within a natural landscape. A central trail line winds from the bottom left towards the top right. Key features and control points are labeled with lines pointing to them:
- MINOR CONTROL TREES: Located at the bottom left, near the start of the trail.
- MINOR CONTROL LANDSLIDE: Indicated by a hatched area on the left side of the trail.
- MINOR CONTROL ROCK OUTCROP: Located on the left side of the trail, above the landslide.
- MINOR CONTROL EPHEMERAL WATERCOURSE: Two locations are marked on the left side of the trail, indicated by dashed lines representing water flow.
- MINOR CONTROL TREES: A second cluster of trees on the left side of the trail.
- MAJOR CONTROL BOULDER FIELD: A large area of boulders on the right side of the trail.
- MAJOR CONTROL BRIDGE LOCATION: Located at the top right, where the trail crosses a stream.
The landscape includes various types of trees (coniferous and deciduous), a stream, and topographical features like hills and boulders. The trail is shown as a solid line, and the overall design emphasizes natural resource protection and user safety.
Figure 5.6 - Trail Layout and Design

3.7.5.1.1. TRAIL LAYOUT AND DESIGN
CALIFORNIA STATE PARKS
NOT TO SCALE
3.7.5.2. 5.7.5.2. Designed Control Points
Designed control points are locations on the landform that call for a trail structure. Incorporating certain characteristics of the landform is essential to the successful performance of some trail structures, such as watercourse crossings and turns. Refer to Chapter 12, Topographic Turn, Climbing Turn, and Switchback Construction, Chapter 14, Drainage Structures, Chapter 16, Timber Planking, Puncheon, and Boardwalk Structures, and Chapter 17, Bridge Construction, for further information on selecting, designing, and constructing drainage structures.
3.7.5.2.1. 5.7.5.2.1. Watercourse Crossings
Watercourse crossings include wet crossings (such as armored stream crossings) and fords or dry crossings (such as bridges). Some wet trail crossings in low volume watercourses can be crossed even during peak flows. These streams are usually ephemeral. Appropriate crossing locations have a mild stream gradient that is controlled by a feature such as bedrock, boulders, or large trees, often referred to as “nick points”, in or near the channel. These features stabilize the channel gradient and make it easier to construct and maintain the crossing. The channel must be straight and not subject to lateral scour, undercutting, or deposition. Streambanks must be stable with moderate slopes for successful construction of the trail in and out of the channel. Photo 5.22 depicts a wet crossing with a low gradient, straight channel with bedrock at the base of the crossing to control the stream gradient and stabilize moderately sloped approaching banks.

Photo 5.22 - Wet Crossing
Fords are primarily intended for use by horses. They are located in streams that have low to moderate flows, or are closed to use when high flows occur, usually in winter and early spring. Good ford locations exist where the stream gradient levels off after a steep run and the channel is comparatively wide. This leveling off causes small rocks and coarse aggregate to drop out of suspension and deposit in the streambed creating a streambed that is easy for horses to cross without slipping on large, smooth, slick rocks. The wide channel reduces the depth of the water and the level stream gradient reduces the velocity of the water. Streambanks must be stable and have moderate slopes for construction of a trail in and out of the active stream channel. This combination of geomorphic and hydrologic characteristics provides the safest and most sustainable ford crossing. Photo 5.23 depicts an equestrian ford across a moderate flow, low gradient, and wide channel with good approaching banks.

A photograph showing a person wearing a green jacket and a tan hat riding a dark horse across a shallow stream. The horse is wading through the water, which is splashing around its legs. The streambed is rocky and covered with fallen branches and debris. The background consists of dense evergreen trees and a steep, rocky bank.
Photo 5.23 - Equestrian Ford
Dry watercourse crossing sites are usually located on large and deep bodies of water or on Class I trails, where user expectations do not include getting wet. These sites have bridges with specific design requirements. A bridge site is located where the stream channel narrows and the banks are high above the stream. A narrow channel limits the length and size of the bridge, and the high banks keep the bridge above future flood events. Careful investigation of the stream channel is required to ensure that the bridge is above future flood events (100-year flood event minimum). The channel should be inspected up- and downstream of the crossing site to find indications of past flood events such as scour marks on streambank walls, vegetation loss or changes, driftwood debris deposited on ledges or flat areas, pieces of grass and flotsam left hanging on vegetation, silt lines left on trees or rocks, and tree bark scarred by flood debris. (See Photos 5.24 and 5.25.) To determine the high water mark, design for the largest woody debris that might be carried downstream in a flood event. Floating logs and trees can project several feet above the high water mark, so additional freeboard is required for these objects to pass under a bridge.

The image consists of three side-by-side photographs. The left photograph shows a rocky stream bed with white water rapids; two yellow arrows point to the edges of the channel, indicating the scour line. The center photograph shows a tree trunk in a stream with a horizontal scar on its bark; two yellow arrows point to this scar, indicating a bark scar. The right photograph shows a forest stream with a line of silt or debris on the bank; a yellow arrow points to this line, indicating the silt line.
Photo 5.24 - Scour Line (left), Bark Scar (center), and Silt Line (right)
The general condition of the stream channel must also be evaluated. Banks need to be stable and, if possible, composed of scour-resistant material such as bedrock. In the absence of bedrock, the bank material should not be subject to sloughing or crumbling. The banks adjacent to the bridge abutments must not be subject to erosion or undercutting from lateral scour. Any bridge site should be located away from the outside bend of a channel where banks will be eroded by the current. (See Figure 5.7.)
The general health of the watershed should also be evaluated. Channels lacking exposed bedrock, boulders, or large woody debris may be in a “depositional” mode. This condition is exemplified by small aggregate and silt deposited in terraces adjacent to the channel and reflects an unstable watershed. The true scour line, “thalweg”, of the channel may be substantially lower than what is observed in the field. Knowing the true thalweg is critical in determining the depth of the bridge abutments that are to be constructed adjacent to the channel. In addition, a stream channel filled with aggregate may cause lateral bank scour that could undermine abutments adjacent to the channel. (See Photo 5.26.)
Prior to the final selection of a bridge site, a hydrologist or a qualified engineer should be consulted to evaluate the crossing and calculate the water discharge levels during a 100-year flood event. See Chapter 14, Drainage Structures, for further information on these methods.

A photograph of a river flowing through a rocky, forested landscape. A bridge structure is visible in the background. A yellow arrow points to a pile of debris on the riverbank.

A photograph of a river with a large pile of debris (logs and branches) in the foreground. A yellow arrow points to the debris pile.
Photo 5.25 - Woody Debris (top) and Flotsam (bottom) After Flood

A diagram of a river channel on a brown background. The river is represented by a blue line. Four yellow arrows point to different sections of the river with labels: 'Bad: outside bend subject to bank erosion' points to a sharp curve; 'Poor: wide crossing and lower banks' points to a wide, shallow section; 'Good: straight and narrow channel with higher banks' points to a straight, narrow section; and 'Fair: straight channel but wider crossing and lower banks' points to a straight section that is wider and shallower.
Figure 5.7 - Identifying the Best Bridge Location

A photograph showing a stream flowing through a forest. The water is turbulent and white with foam, indicating a fast flow. The banks are covered in fallen leaves and debris, suggesting a depositional environment.

A photograph showing a stream flowing through a forest. The water is calm and reflects the surrounding trees. The banks are rocky and covered in moss, suggesting a healthy, stable environment.
Photo 5.26 - Watershed in Depositional Mode (left) and Healthy Watershed (right)
When designing a watercourse crossing, it is important to make certain that the trail is fully separated from the inner gorge before beginning a descent. If the downhill descent occurs within the inner gorge of the watercourse, the trail will likely traverse through wet and unstable ground. Depending on the gradient of the watercourse, the traverse can be a considerable distance. It is preferable to layout the trail so that it levels off or gradually climbs out of the influence of the inner gorge before the trail begins to descend. Photo 5.27 illustrates a trail alignment that descends too quickly (red line) and a trail alignment that climbs out of the influence of the inner gorge (yellow line).

A photograph showing a trail alignment in a hilly, wooded area. The trail is marked with a dashed red line that curves through the terrain, and a dashed yellow line that runs parallel to it in some sections. The landscape is covered in dry grass and scattered trees.
Photo 5.27 - Trail Alignment In and Out of the Influence of an Inner Gorge
3.7.5.2.2. 5.7.5.2.2. Turns
Turns are trail features used to gain additional linear run to reduce linear grades. If landbase, resources, aesthetics, or construction feasibility prohibits lengthening the trail in a curvilinear fashion, then trail features such as topographic turns, climbing turns, and switchbacks are used to overcome elevation gains between control points. If a turn is required, the designer must find the appropriate location for it. The appropriate location for a turn will depend on a number of criteria related to the design, function, and sustainable performance of the feature. See Chapter 12, Topographic Turn, Climbing Turn, and Switchback Construction, for further details on designing and constructing these trail structures.
The first option is a topographical turn, facilitated by a small hill or knoll, which allows the trail to contour around a small hill while maintaining an outsloped trail bed. This feature facilitates a change in direction without the additional construction and drainage design associated with climbing turns and switchbacks. It is often so small that it does not appear on a 40-foot contour map and can only be located through field reconnaissance. The hill conceals one trail leg from the other, so cutting across the turn does not occur. An outsloped trail bed cannot be accommodated where the trail crosses over the saddle after it completes its circumnavigation of the hill. At this location, the trail needs to be crowned, insloped, or have a drain dip installed for drainage. Usually these drainage features are very short in length because saddle crossings are narrow. (See Photo 5.28.)

An aerial photograph of a hillside with a red dashed line indicating a proposed topographic turn. The line follows the contour of a rock outcrop, showing how the turn is integrated into the natural terrain. The hillside is covered with sparse vegetation and trees.
Photo 5.28 - Using a Rock Outcrop to Create a Topographic Turn
Another option is a climbing turn or a switchback. Generally, a climbing turn is preferable to a switchback because it requires less excavation and retaining wall construction. Typically, a climbing turn is located on a hillslope of 30% or less, and a switchback is located on a hillslope steeper than 30%. Switchbacks located on steep slopes require more excavation into the hillside to construct the upper leg and the inside (upper) corner of the turn. The lower portion of the switchback usually requires a retaining structure to support the fill material used to build the lower or downhill portion of the turn. Located on steep hillslopes, the change of direction associated with the upper and lower leg of a switchback is more acute than those of a climbing turn. However, the design and location for both structures are very similar. Both are built into the hillslope and located on the landform where they can be properly drained. Since the upper legs of both the climbing turn and switchback need to be insloped to prevent water from draining onto the lower leg, they must be placed where the upper leg can drain freely off the corner of the turn. The best place for these types of turns is on the nose of a ridge or near the upper flanks of a watercourse. Both locations allow the water collected on the upper leg to drain freely off the corner of the turn. When a turn is located near a watercourse the apex (corner) of the turn should be located close to the top of the slope leading into the watercourse. This placement allows water from the upper leg to drain into the watercourse. No portion of the turn should be constructed within the watercourse. Figure 5.8 illustrates topographically appropriate locations (marked by an X) for climbing turns and switchbacks.

A topographic map of a hilly area with green contour lines. A yellow line traces a trail path. Two red 'X' marks are placed on the trail to indicate specific locations. One 'X' is on a steep slope, and the other is at a sharp turn in the trail. The map includes labels for 'Humboldt River', 'Thomas Hill', and 'Jeep Trail'. The trail path is highlighted in yellow, and the red 'X' marks are clearly visible.
Figure 5.8 - Locations for Climbing Turns and Switchbacks
Another important location criterion for these structures is a break in slope. By locating the corner of the turn where there is a distinct change or break in the slope of the hillside, one leg can be located above the break and one leg can be located below the break. This break in slope can be used to obscure the lower leg from the field of vision of a trail user coming down the upper leg. The trail user coming down the upper leg will not see the lower leg until they reach the turn, which is a very effective method of preventing users from cutting between the two legs of a turn. This technique can be further enhanced by taking advantage of natural barriers such as trees, large rocks, or dense brush. The turn is placed where these barriers are located between the two legs. Natural barriers also obscure the lower leg from the trail user's line of sight and can prevent cutting between the two legs of the turn.
Another design technique that will reduce the cutting of turns is to place the corner of the turn where the turn provides the user with a scenic view of the surrounding countryside. Incorporating a view at the corner of the turn draws the trail user to the turn and rewards them with a scenic vista.
It may not be possible to locate a turn where all of these features are present, but the more of these features that can be included the more functional and sustainable it will be. Photos 5.29 demonstrate the appropriate location for a climbing turn on a ridge nose with a slope less than 30% (left). Note no retaining wall was used at the bottom of the landing. On the right of Photo 5.29, the appropriate location of a switchback on the flank of a watercourse with a slope greater than 30% is shown. Note the retaining wall at the bottom of the landing. Photo 5.30 provides examples of using a break in the slope and natural barriers to prevent cutting of the turn by trail users.

Photo 5.29 - Locations for Climbing Turns (left) and Switchbacks (right)

Photo 5.30 - Break in Slope and Natural Barriers to Prevent Cutting
3.7.5.2.3. 5.7.5.2.3. Topographic Control Points
Sometimes there are topographic features on the landform that can serve as control points. The most common of these features is a low point or saddle on an extended ridge. These locations control the elevation of a potential trail alignment simply by being the lowest point of land that a trail can pass through. Recognizing these control points early in the layout and reconnaissance process can expedite the determination of the trail corridor, the location of control points, and the grades between those control points. Photo 5.31 demonstrates how for a trail alignment with a starting location (A) and an ending location (B), the saddle on the ridge between those two locations (arrow) can serve as an elevation control.

A photograph of a mountain ridge under a blue sky with scattered white clouds. The ridge is covered in dry, brownish vegetation. A yellow arrow points to a saddle on the ridge. A red letter 'B' is placed on the ridge top to the right of the saddle. A red letter 'A' is placed on the left slope of the ridge. The foreground shows a grassy field with some trees.
Photo 5.31 - Saddle on a Ridge as an Elevation Control
3.7.5.2.4. 5.7.5.2.4. Problematic Topography
Certain locations on the landform should be avoided by trail designers whenever possible. One of these locations is a ridge top. Trail designers often locate trails along the tops of ridges for the view and to minimize the amount of required brushing, clearing, and trail construction. If the ridge is comprised of very durable bedrock, this layout practice is acceptable. However, if the ridge top is comprised of soil, the construction of the trail tread (even light brushing and clearing) will result in the trail bed being lower than the surrounding soil horizon. With the trail bed lower than the terrain adjacent to it, surface runoff cannot flow off the trail, and it will begin to flow down the trail. The trail effectively becomes a ditch and the combination of water erosion and mechanical wear quickly incises the trail bed. This condition cannot be remedied with drainage structures such as water bars or grade reversals. (See Photo 5.32.)
If a trail is to be located along a ridge, it is much better design practice to locate it just below the ridge top where hillside construction will facilitate sheet flow across the trail bed. The trail is close enough to the top of the ridge to offer good views yet facilitate natural surface runoff. This layout practice may also provide opportunities to have the trail cross the ridge top where a low point or saddle occurs. This design offers the trail user different views in a dramatic fashion rather than just seeing the same view for an extended period of time. (See Figure 5.9.)
A similar problem occurs when trail designers layout trail on flat ground. As soon as the trail is constructed, the trail bed is lower than the surrounding soil horizon. Even if the sod is not removed, the initial user traffic will compact the soil in the trail bed below the adjacent terrain. Sheet flow accumulates in the trail bed and ponds or flows down the trail. (See Photo 5.33.) Again, the combination of soil saturation, mechanical wear, and water erosion creates an entrenched trail that cannot be corrected with water bars or grades reversals.

A photograph of a desert trail showing erosion. A yellow line marks the original grade, and a blue line shows the incised trail. Arrows indicate the direction of rainfall runoff causing the erosion.
Photo 5.32 - Trail Becoming Incised
The best solution to this problem is to avoid this type of topography during the design and layout process. If flat, poorly drained areas cannot be avoided then the trail must be hardened or elevated using construction techniques or structures such as aggregate surfacing, turnpikes and causeways, stone pitching, timber planking, puncheons, or boardwalks. See Chapter 14, Drainage Structures, and Chapter 15, Timber Planking, Puncheon, and Boardwalk Structures, for further information on these prescriptions and techniques.
Another common trail design and layout mistake is to route a trail through a meadow. Again, most meadows are on flat and poorly drained ground. Once the trail is constructed, the trail bed is lower than the surrounding soil horizons. The trail collects water, causing the trail bed to become saturated, deformed, and eroded. Once the trail reaches this condition, trail users will no longer stay within the trail bed and will develop a trail parallel to the degraded one. If left uncorrected, this situation often leads to multiple parallel trails developing across the meadow, each one replacing the entrenched and degraded trail that preceded it. (See Photo 5.34.)

A topographic map of a forested area with contour lines indicating elevation. A dashed black line represents a ridge line, and a dashed red line represents a trail. The trail follows the ridge line and then curves to the right. The map includes labels for 'Creek', 'P A R K', 'FOREST', 'STATE', and 'BOUND'. A legend at the bottom identifies the dashed black line as the 'Ridge Line' and the dashed red line as the 'Trail'.
Figure 5.9 - Trail Layout Below a Ridge

Two side-by-side photographs showing trail conditions. The left photograph shows a person standing in a deep, muddy, and water-filled trench that has formed in the trail bed, surrounded by fallen leaves and trees. The right photograph shows a close-up of a trail bed that is heavily saturated with water and mud, with a large, dark, irregular mound of earth and debris in the center.
Photo 5.33 - Entrenched Trail (left) and a Saturated and Deformed Trail Bed (right)
The solution to this problem is to locate trail alignments outside the meadow on stable well-drained soil. The alignment is close enough to provide good views of the meadow but does not encroach upon the fragile meadow environment. The meadow becomes a control point that the trail must avoid. If routing the trail outside the meadow is not feasible due to overriding social or political issues then the trail segment through the meadow must be elevated or hardened through the use of trail structures previously mentioned.

Photo 5.34 - Multiple Entrenched Trails in a Meadow (left) vs. On the Edge (right)
3.7.5.2.5. 5.7.5.2.5. Orientation/Aspect
Another important factor to consider when designing and laying out a trail is its orientation to the sun ("aspect"). In California, a southern aspect will often provide more direct exposure to sunlight while a northern aspect will provide less. If the trail is at a high altitude with significant snowfall and cool temperatures, a southern aspect will facilitate a quicker snow melt and provide warmer and dryer conditions to trail users. Conversely, a northern exposure will provide cooler and moister conditions. At low elevations that receive warm to hot summer temperatures, a northern aspect will often provide trail users with cooler and more shaded conditions.
Due to the different temperatures and moisture conditions between southern and northern aspects, they frequently have different vegetative communities. The southern aspect may have more shrub and brush species while the northern aspect may have more trees and ground cover.
Taking advantage of the landform's aspect can greatly improve the availability and performance of the trail and the comfort of the trail user.
Please note that the attributes associated with the landform's aspect can vary throughout California. Temperature and vegetation conditions can be highly variable and must be verified during the research and reconnaissance process. (See Photo 5.35.)

Photo 5.35 - Southern Aspect (left), Northern Aspect (right)
3.7.6. 5.7.6. Final Grade Reconciliation
Once all major and minor control points are located within the trail corridor, the average and maximum sustainable linear grades between control points are identified. These grades can then be compared to the designed trail grade. If there are no conflicts, the trail alignment can be finalized. The final linear grade between each control point must be equal to or less than the maximum sustainable linear grade and the designed grade, which may require reconciling segments where the average linear grade exceeds these limits. Additional linear run can be obtained through topographical turns, climbing turns, or switchbacks. Engineered and constructed solutions may also be necessary to work through minor controls and reduce linear grades, which can require many days in the field. By completing this trail design process, the designer will gain a thorough knowledge of the landform and be aware of all the issues and proposed design solutions. By the end of field reconnaissance, the designer should have explored every possible routing and selected one that represents the best possible alignment. For pedestrian trails, the designer can now determine if the proposed alignment meets accessibility standards. By now, every option should have been explored to design and construct an accessible trail.
At this point in the design and layout process, the trail designer determines if the proposed trail alignment is sustainable or not. If it is sustainable, move forward with flagging the trail alignment. If it is not sustainable, the findings should be documented and the proposed trail should not be pursued. However, in some cases, if the trail alignment is determined to be not sustainable but is maintainable, and the proposed trail is required due to critical operational needs or public demand, then the designer should identify the deficiencies in the proposed trail and quantify the additional costs to construct and maintain the proposed trail. Appropriate managers should then determine if the proposed trail alignment should be pursued.
3.7.7. 5.7.7. Flagging the Trail Alignment
Upon completion of the reconnaissance, a trail alignment consistent with management goals, trail design standards, and resource protection policies will have been identified. Reconnaissance determined the linear grades between major and minor control points, which are then used to establish the flag line for the proposed trail. (See Figure 5.10.)

Figure 5.10 - Trail Alignment Ready to Flag
Flagging of the trail alignment is performed between established control points, rather than from the starting to the ending points of the trail in a linear fashion. When there is substantial distance between control points or the vegetation is very dense, flagging between control points is sometimes performed by flagging from both control points towards the center. At the location where the two flag lines meet, the flag line is adjusted or mended to provide a well graded joining of the two lines. Flagging between control points breaks down the job of flagging a new trail alignment into manageable segments; helps keep the flag line within the desired linear grade; ensures that all control points are accounted for; and eliminates abrupt grade changes. (See Figure 5.11.)

Figure 5.11 - Flagging from Two Control Points
3.7.7.1. 5.7.7.1. Initial Flagging Process
Normally, two people are sufficient for flagging a trail alignment. They use clinometers or Abney hand levels to sight linear grades. Prior to starting, they stand on level ground and use their instruments to obtain a horizontal reference point on each other's bodies. They look through their instruments at 0% (level to eye height) and locate where that horizontal line is on the body part of the other person. People of similar height are usually partnered, so their reference points are on each other's faces. If one person is substantially taller than the other, the taller person will sight over the shorter person's head, and they will not have a horizontal reference point. When shooting grades in the field, both members of the flagging team must be able to sight on each other to validate the linear grade. The flagging team's linear grade measurements should be within 1% of each other, which cannot be accomplished if one partner is unable to sight on the other. If there is a significant difference in height between the two flaggers, the shorter person can carry a rod or pole that is long enough for the taller person to obtain a horizontal reference point. That location on the rod is then marked with colored tape and flagging for future reference. (See Figure 5.12 and Photo 5.36.)
Once the horizontal reference points are established, flagging team members are assigned their respective roles. One person is the shooter, who locates the start of the new trail alignment (major control point). The other team member walks the alignment at a linear grade approximate to the one established for the segment (between the two control points) during reconnaissance. At the initial flagging of the alignment, the flagged line is loose (spaced 40 to 70 feet apart). Tight flagging is not necessary, as adjustments may occur before the flag line is finalized. The length of the shot will usually be limited by vegetation or landform topography. Brush and trees often obscure the flagger, which limits the length of the shot.

CLINOMETER SET TO LEVEL (0%)
REFERENCE POINT
ROD
LEVEL GROUND
3.7.7.1.1. LEVELING EXERCISE

FLAGGING PLACED AT LAST DESIRED POINT
CLINOMETER READS DESIRED PERCENT GRADE
REFERENCE POINT REMAINS CONSTANT
TEMPORARY FLAGGING TO MARK GRADE IF ACCEPTABLE
DESIRED GRADE
3.7.7.1.2. SHOOTING GRADE

3.7.7.1.3. CLINOMETER
Figure 5.12 - Sighting for Grade with Clinometer

3.7.7.1.4. SIGHTING FOR GRADE WITH CLINOMETER
CALIFORNIA STATE PARKS
NOT TO SCALE

A photograph showing two men standing on a paved path in a park. They are holding a yellow laser level horizontally between them. The man on the left is wearing a light blue shirt and dark pants, while the man on the right is wearing a dark shirt and jeans. They are both looking at the level. The background shows trees and a clear sky.

A photograph showing two men standing on a dirt trail in a forest. They are holding a yellow laser level horizontally between them. The man on the left is wearing a blue shirt and jeans, while the man on the right is wearing a red shirt and jeans. They are both looking at the level. The background shows trees and a dirt path.
Photo 5.36 -Trail Workers of Similar (left) and Dissimilar Height (right)
Once the flagger is on grade, the shooter and flagger use their clinometers or Abney hand levels to sight at the horizontal reference points on each other's bodies. The instruments should read the linear grade for that segment, and both team members must be within 1% of each other. If the two grades are off more than one percentage point, one person is reading their instrument incorrectly, shooting at the wrong reference point, or one instrument is defective. The team re-sights the grade to determine the cause of the error and takes the appropriate corrective action. On an ascending trail, if the instrument readings are within one percentage point of each other and the linear grade is too low, the flagger in front moves up the slope to increase the grade. If the linear grade is too high, the flagger in front moves down the slope to lessen the grade.
Once the flagger is at the correct linear grade, they make a scuffmark where they are standing (downhill foot). This mark represents the known elevation for that shot, and the shooter will occupy that location during the next grade shot. The flagger either ties a flag on a piece of vegetation directly above the place they are standing, or places a wire flag in the ground at that location. When tying a flag on vegetation, select a stem or branch that is substantial enough to be around for at least one year, and tie the flag high enough that it can be easily seen the next time the alignment is walked. The initial flagging should be spaced so that a person standing at a flag station can always see the flags in front and behind them. If the flagging is expected to survive more than one year, it is recommended that a durable grade of flagging be used. Once the flagger has scuffed the ground and tied or placed a flag representing trail grade, they move forward for the next shot, and the shooter occupies the mark where the flagger previously stood. This process is repeated until the next control point is reached. Once at the next control point, the process repeats itself except the linear grade prescription may change for the new segment, based on prescriptions established during reconnaissance. (See Photo 5.37.)
In some locations the ground (topsoil or A horizon) may be covered by layers of organic material or vegetation (tundra mat) that is too thick to establish an accurate elevation for linear grade identification. In these situations, the flaggers can use two lengths of rebar to perform the flagging. Once the rebar is marked to reflect the horizontal reference point of the flagger, it is shoved through the organics or tundra mat until it strikes soil. The flagger then sights across the reference point on one piece of rebar to the reference point on the other piece. Since both pieces of rebar are resting on topsoil, an accurate linear grade for the underlying soil can be obtained. (See Photo 5.38.)
Curvilinear alignment should be carefully followed during flagging. So that the trail is kept nearly perpendicular to overland sheet flow, linear grade shots should be taken between all topographic breaks in the landform including subtle breaks. To ensure the trail will not accumulate or divert water, natural drainage patterns should be maintained, including dipping the trail in and out of topographic watercourse features, such as small swales and undulations. Additionally, linear grades should be adjusted relative to changes in the percent of hillslope to prevent the trail from becoming fall line and able to capture and convey the hillside sheet flow. A properly laid out trail will be nearly hydrologically invisible on the landform and will prevent water from entering and running down the trail.
In Figure 5.39, two flaggers shoot across a small rounded ridge (yellow lines) that does not follow curvilinear alignment, resulting in an alignment close to the fall line. An intermediate station (pink flag) at the center of the ridge would produce an alignment slightly longer (green line) but closer to the contour of the landform.
It is important to note that when placing a flag at a scuff marking the correct linear grade, its location represents the outboard hinge of the trail bed and not the centerline of the trail bed. In manuals following traditional trail construction practices, the centerline is influenced by the percent of grade of the hillslope where the trail is constructed. If the hillslope grade is 50% or steeper, the trail bed will be nearly 100% native bench, which means the flag represents the outside edge of the trail bed. For a hillslope grade of 30%, the trail bed is approximately 50% native bench and the flag represents centerline of the trail bed. For a hillslope grade of 10%, the trail bed is approximately 25% native bench and the flag represents the inside quarter of the trail bed. These estimates are based on using fill material for constructing the trail bed. (See Figure 5.13.) Partial bench construction is not a recommended practice as a trail bed comprised of fill material will be subject to differential settling, more susceptible to mechanical wear, and less sustainable. For these reasons trail designers should always strive for full bench construction.

The image is a vertical stack of three photographs. The top photo shows a person from behind, wearing a plaid shirt, a green hat, and a large green backpack, holding a yellow measuring tape across a grassy hillside. Another person is visible in the distance. Red dashed arrows point towards the person in the distance. The middle photo is a close-up of a person's foot stepping on a patch of bare soil, which is circled with a yellow dashed line. The bottom photo shows a person in a plaid shirt and backpack crouching on a grassy hillside, installing a red flag into the ground. The background shows rolling green hills under a clear blue sky.
Photo 5.37 - Flagger Adjusts Linear Grades (top), Marks Locations (middle), and Installs Flags (bottom)

A photograph showing two people in a field of dense green brush. One person, wearing a dark jacket and a cap, is in the foreground, looking towards the right. The other person is further back, also in the brush. A long yellow measuring tape is stretched between them, held taut. The background shows more brush and a hint of a paved area or road in the distance.
Photo 5.38 - Using Rebar to Mark a Horizontal Reference Point
When full bench construction is prescribed, the flag represents the outside edge of the trail. To achieve full bench construction (regardless of the percentage of the hillslope), the trail bed is simply constructed further into the hillside. (See Photo 5.40.) It is important for the designer to understand this concept, since identifying the outside edge of the trail bed will enable the construction crew to locate the trail travelway for brushing and clearing (2 feet beyond the top of the cut bank to 2 feet beyond the outboard hinge) and determine where to start the top of the cut bank on the hillslope.
Photo 5.40 illustrates how, following traditional construction practices, a trail constructed on a 30% hillslope would be half native bench and half fill bench (yellow line). However, by constructing further into the hillslope the entire trail bed is comprised of native material (red line).
Upon completion of the initial flag line, the flagging team re-traces the alignment and re-evaluates the route. It is good practice to re-evaluate work and make adjustments to improve the alignment. Once re-evaluation has been completed, the route is “tight flagged” by spacing the flags 20 to 30 feet apart.
If the trail supervisor, equipment operators, and hand crews are skilled enough to adjust the clearing limits of the travelway to the hillslope, this flag line is sufficient to initiate the clearing and brushing of the trail. If not, additional flag lines representing travelway are installed. These additional lines show the clearing limits for trail construction crews. These outer flag lines are established by using a combination of trail construction standards, percent of hillslope, and construction methods to be used for the project.
After completing the initial flag line, a Trail Work Log is developed for construction. See “Developing Trail Work Logs and Cost Estimates” below for details on how to develop a Trail Work Log.

The image consists of two photographs. The top photograph shows a grassy field with a line of trees in the background. A dashed green line follows the natural curve of the terrain, while a solid yellow line runs straight across the field. Two people are visible in the field, one near the dashed line and one near the solid line. The bottom photograph shows a grassy hillside. A dashed green line follows the contour of the hill, while a dashed yellow line runs straight down the slope. A person is visible on the hillside near the dashed green line.
Photo 5.39 - Curvilinear vs. Fall Line Alignment
50%
SIDE SLOPE

Diagram illustrating a 50% side slope excavation. The ground line is shown as a dashed line. The excavation is a full bench (preferred). The back slope is 1:1. Excess spoil material is used in fill areas. A grade stake is shown on the right side of the excavation.
40%
SIDE SLOPE

Diagram illustrating a 40% side slope excavation. The ground line is shown as a dashed line. The excavation is a 3/4 bench. The back slope is 1:1. The fill slope is 1 1/2":1. A grade stake is shown on the right side of the excavation.
30%
SIDE SLOPE

Diagram illustrating a 30% side slope excavation. The ground line is shown as a dashed line. The excavation is a 1/2 bench. The back slope is 1:1. The fill slope is 1 1/2":1. A grade stake is shown on the right side of the excavation.
20% - 5%
SIDE SLOPE

Diagram illustrating a 20% - 5% side slope excavation. The ground line is shown as a dashed line. The excavation is a trail bed with outslope shown for all grades and slopes. The back slope is 1:1. The fill slope is 1 1/2":1. A grade stake is shown on the right side of the excavation.
NOTE: AMOUNT OF TRAIL BENCH VARIES LINEARLY W/ % OF SIDE SLOPE. ALL SOIL SHOULD BE MINERAL AND CONTAIN NO ORGANIC MATERIAL.
Figure 5.13 - Travelway Excavations

3.7.7.1.5. TRAVELWAY EXCAVATIONS
CALIFORNIA STATE PARKS
NOT TO SCALE

A photograph of a forest trail construction site. A yellow dashed line outlines a rectangular area labeled 'Fill'. A red line runs along the slope, labeled 'Full Bench'. A yellow line runs parallel to the red line, labeled 'Half Bench'. An arrow points to the slope, labeled '30% Hillslope'. The ground is covered with brown leaves and ferns.
Photo 5.40 - Half Full Bench (yellow line) and Full Bench (red line)
3.7.7.2. 5.7.7.2. Second Flagging of the Alignment
Once the travelway has been brushed and cleared, the original flag line is obliterated. Before construction can begin, the alignment needs to be re-flagged. Re-flagging is performed in the same fashion as the first flagging effort, with the exception that the ground is now bare and can be seen in greater detail. In addition to the trail grade flag line, additional flags may also be placed to identify the top of the cut bank, and the inboard and outboard hinges of the trail bed. The location of the top of the cut bank varies, depending on the percent of the hillslope. If the goal is to achieve a full trail bed, the cut bank will be high. The need for additional flagging depends upon the experience of the trail supervisor and the work crew. Along with the second flagging process, additional pin flags are placed where trail structures are to be constructed. These flags are marked with a permanent pen to identify the location (footage or station) and the specific work prescription at that station. These flags, along with the Trail Work Log, will later serve as a detailed guide for the trail crew leader. (See Photo 5.41.)

A photograph showing a coastal trail construction site. The trail is a dirt path on a hillside, marked with pink flags. The ocean is visible in the background under a blue sky with clouds.
Photo 5.41 - Travelway Brushed, Cleared, and Reflagged
3.8. 5.8. Developing Trail Work Logs and Cost Estimates
The Trail Work Log identifies the construction activities and structures required for the project. Usually the designer and trail supervisor or crew leader hike the alignment and use a Rolatape or GPS to establish a location or station and linear trail distance for each construction activity. When the location of a structure is encountered, the designer identifies the location, type of structure or work activity, size or quantity of the structure or work activity, and materials to be used. For local native materials, the source is also identified. This information is entered into a Trail Work Log using pre-determined work category descriptions and units of measurements so the data can be sorted later. After the Trail Work Log is complete, the data is sorted by work category and work volume. This information is put into electronic worksheets that calculate labor, materials, equipment, and time required to construct the trail. These calculations are critical for planning and budgeting trail construction. See Chapter 2, Trail System Development and Management, for further information on developing trail construction cost estimates.